Shop
A subsection of the Beginner's Guide.
Daily Sales Shop
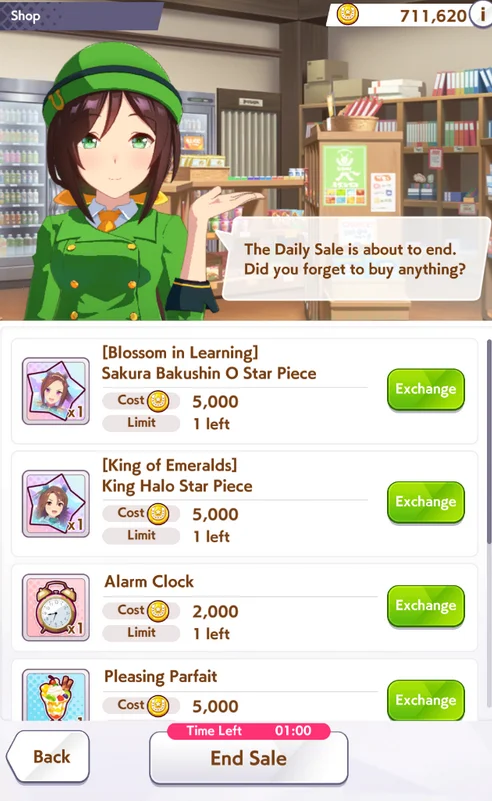
While doing our Team Trial runs, we may have gotten a popup for a “Daily Sale”. The Daily Sales shop can appear up to 3 times a day while doing various content under the Race menu, and contains 2 random Star Shards, an Alarm Clock, and 4 various materials. In the beginning, we only want to purchase the Alarm Clock.
Daily Shop
Monies can be scarce in the early-game, and we need hundreds of Star Shards to convert into a Trainee or Uncap Trainees. Alarm Clocks are used to retry failed Career Goal Races, and will be important to acquire.
TIP
Alarm Clocks are very important in the upcoming scenario, Make a New Track. Due to this, it is recommended to not spend too many Alarm Clocks.
After purchasing the Alarm Clock, don’t forget to click End Sale. Another Daily Sales shop cannot appear while our current one is active.
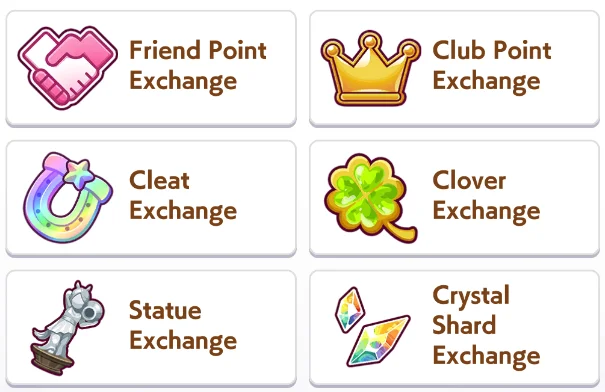
Backing out of the Daily Sales shop, we can see 6 other shops. The first is the Friend Point Exchange.
Shop Menu
Friend Point Exchange
In this shop, we can exchange Friend Points for various things. Friend Points (FP) are acquired from weekly Team Trial rewards, and other players borrowing our Support Card. The latter will most likely not happen in our early weeks, so the main source of FP will be Team Trials.
The most important thing to acquire from the Friend Points shop is the Follow Slot Boost. We only start with 20 Follow Slots, and can buy up to 40 from the FP shop.

Follow Slot Boost
As we progress through the game and receive more FP per month, we can also consider purchasing the Hint Books and the Haru Urara Support Card. As a starting player, however, we most likely will not be able to afford these for a bit.

Urara SSR in the Friend Point Shop
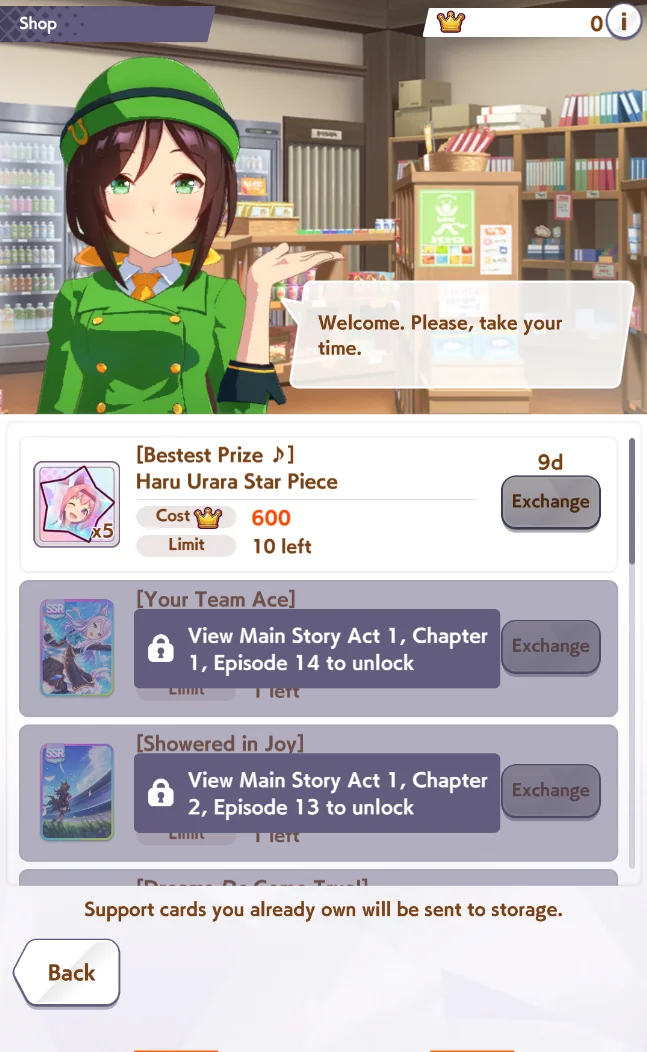
Club Point Exchange
The second shop in the menu is the Club Points Exchange. In this shop, Club Points can be exchanged for various free Support Cards and Star Shards. To purchase these Support Cards, we must first unlock them by finishing each Chapter of the Main Story.
Club Point Shop
For newer players, it is recommended to save Club Points for the Support Cards, as they can provide a good substitute while waiting for Support Card Banners. The Cards to prioritize are the Speed Cards from Chapters 4 and 5, then the other Cards depending on our needs.
There are several methods to earn Club Points. First of all, Club Points can be earned through monthly Club rewards and donating Shoes every day. 10 Club Points are also rewarded for every time the Star Umamusume is borrowed, up to 100 per day.
Cleat Exchange
The third shop on the list is the Cleat Exchange. Cleats can be earned by trading in Support Cards.
To trade in Support Cards, we need to go to the Enhance tab in the Home Screen. Then, go to Support Cards, and then Storage. In this menu, we will see Support Cards that we can exchange for Cleats.
DANGER
Do NOT uncheck the “Hide cards needed to uncap” option. Cleats should only be acquired from unnecessary Cards, and every Card needed for Uncapping is necessary. Only fools cleat event cards.
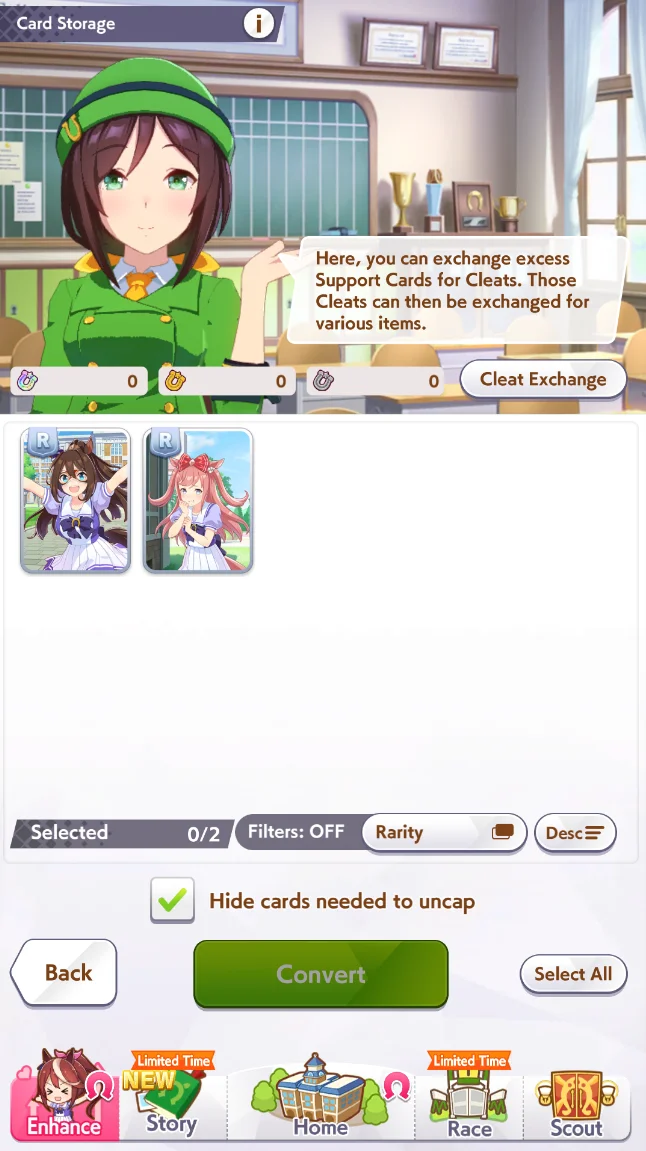
Cleat Menu (Card Storage)
Silver Cleats are acquired from trading in R Cards, Gold from SR, and so forth.
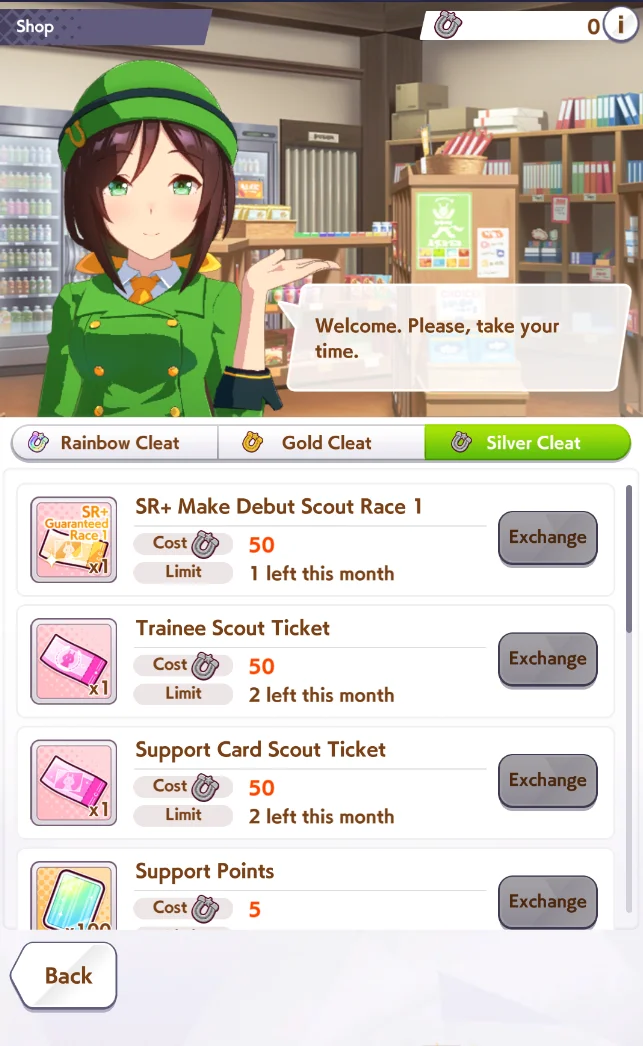
Cleat Shop
The most important thing to purchase from the Cleat Exchange are the Trainee and Support Card Scout Tickets. If we have an excess of Cleats, we can also purchase the SR+ Make Debut Scout Race Ticket. As the Cleat Exchange shop restocks monthly, it’s important to check it at least once a month.
Clover Exchange
The fourth shop on our list is the Clover Exchange. Clovers can be acquired by pulling on Banners and not trading in the Exchange Points for a guaranteed Trainee or Support Card. If we pull optimally, we will not receive any Clovers outside of daily Paid Singles and free draws around holidays and Anniversary Events.
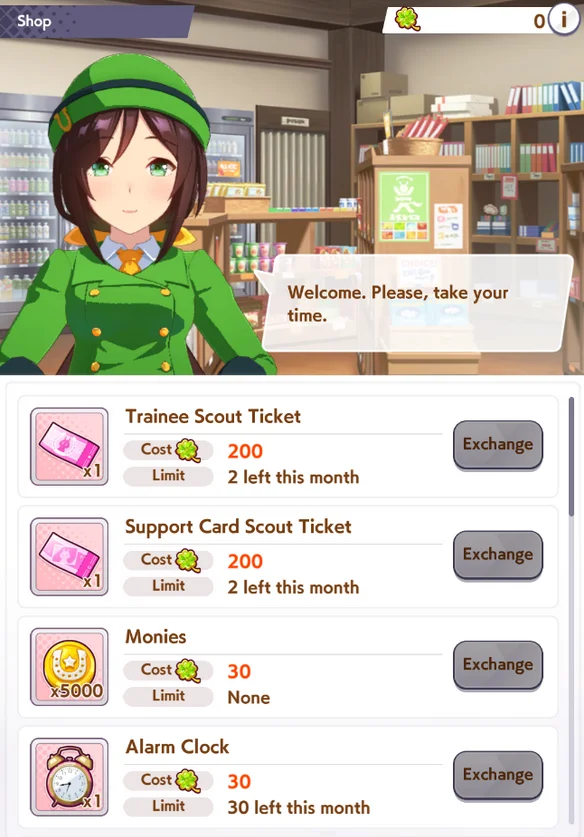
Clover Shop
Similar to the Cleats shop, the most important purchase are the Scout Tickets. Alarm Clocks are also another option.
INFO
200 Clovers are required for one Scout Ticket, or one pull. If those 200 Clovers were Exchange Points on one Banner, we could have gotten a guaranteed 3* or SSR Support Card instead. It’s important to save our draws to make 200 pulls at a time to maximize our gains from the pulls.
Statue Exchange
The fifth shop on our list is the Statue Exchange. Statues can be acquired by pulling duplicate Trainees while Scouting, and can be traded for Star Shards of Trainees we already own. As Statues are a limited resource that can only be acquired in bulk through Scouting, it is recommended to save these for a Trainee we are fond of.

Statue Exchange
The price of the Star Shards go up by 1 Statue per 25 Star Shards traded, up to 5 Statues per Star Shard.
Crystal Shard Exchange
The last shop on our list is the Crystal Shard Exchange. Gold and Rainbow Crystal Shards can be traded in for Rainbow and Gold Uncap Crystals, which can be used to Uncap SSR and SR Cards, respectively. Crystal Shards can only be acquired from limited-time Events.
WARNING
Uncap Crystals are INCREDIBLY valuable, taking months of consistent playing to make one. Be very mindful and make informed decisions when spending them.

Uncap Crystal Shop