Tutorial
A subsection of the Beginner's Guide.
After installing the game, we start off with a tutorial. The tutorial begins by prompting us to the Scout menu.
Scout
Scouting, also referred to as Gacha, is the primary method of acquiring new characters. Playable characters in Umamusume are divided into two categories: Trainees and Support Cards. Trainees and Support Cards will be acquired from separate Scout menus, called Banners.
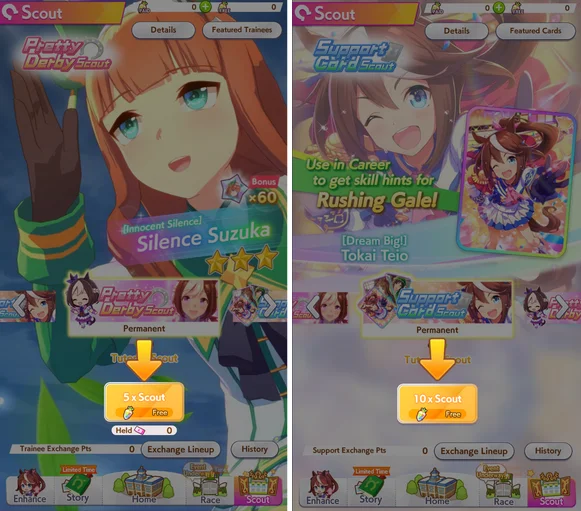
Scouting on the Trainee Banner and Support Card Banner in the tutorial.
Often, people will colloquially refer to Scouting as “pulling [on a Banner]”. While the initial Scouts in the tutorial are free, subsequent Scouts will cost us currency. The tutorial pulls are static, and everyone will get the same Trainees and Support Cards.
Carats
Carats are the premium currency of this game, primarily used for Scouting new Trainees and Support Cards.
Carats are divided into Paid and Free Carats. Paid Carats can be exclusively obtained from purchases made using real-world money, while Free Carats can be obtained from various sources in-game. Although Paid and Free Carats are usually functionally identical, there are special Scouts that can be only done through Paid Carats.
A single Scout will cost 150 Carats, but a separate single Scout can be made once per day, per banner for 50 Paid Carats.
Career
After our tutorial Scouts, the tutorial will prompt us to start a Career. In Global currently, there are two Scenarios, URA Finale and Unity Cup. In the tutorial and for the first few Careers, we will be focusing on the URA Finale.
WARNING
The tutorial Career is an oversimplified, static version of a full Career. This run is inconsequential and is simply for demonstrative purposes.
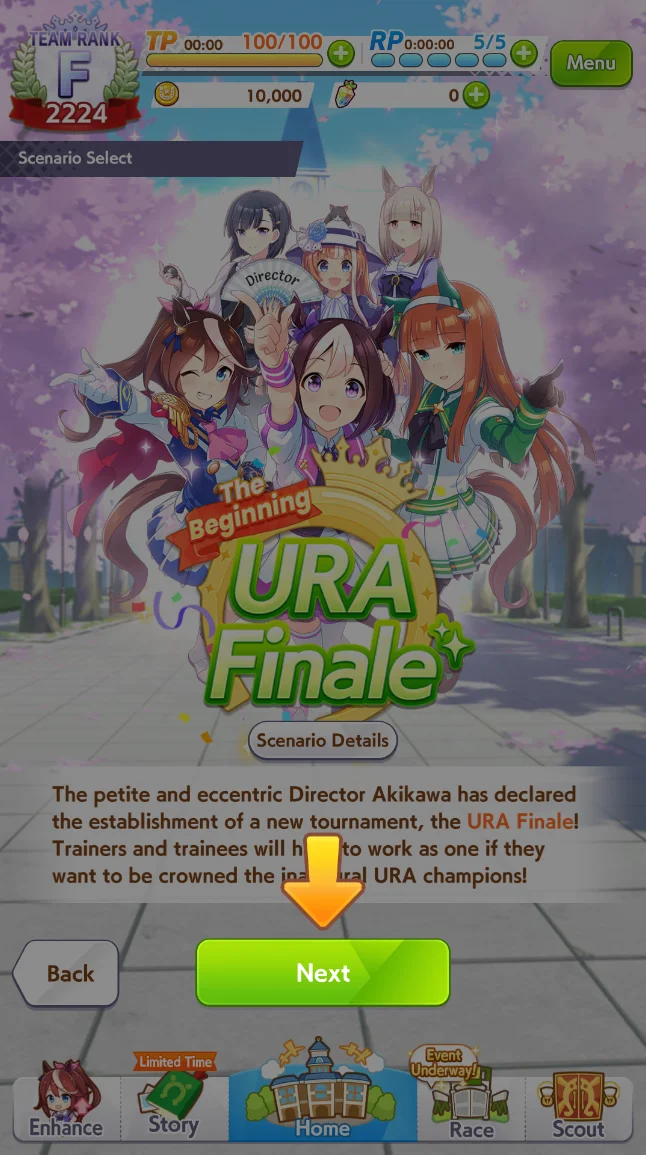
The Tutorial Career
Careers are the primary form of gameplay in this game. It takes form as a Roguelite Idol Management game: Every Career starts from the same beginning and changes based on our decisions and randomly generated factors. Our main goal is to raise our Trainee to successfully finish the Career, which we will discuss further in this section.
Trainees
Before we start the Career, we are prompted to select a Trainee.
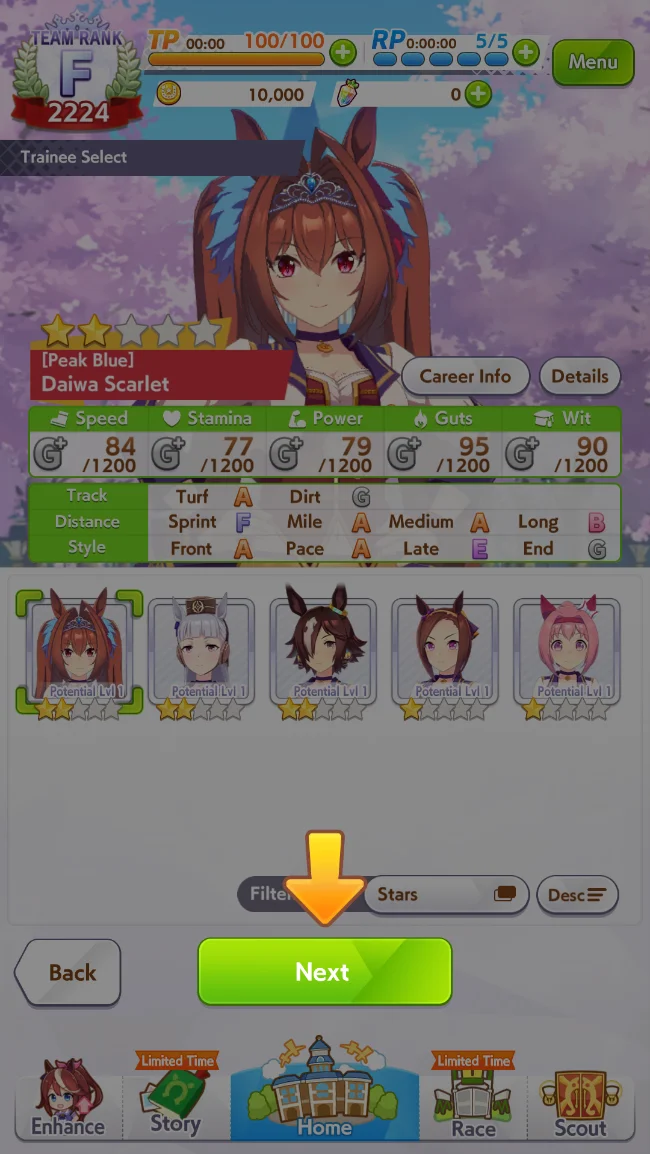
Selecting a Trainee
Trainees are one of the two categories of playable Umas we can unlock in this game. Trainees are the Umas that we actually raise through the Career. After the end of the Career, we will receive a copy of our Trainee called a Veteran Umamusume.
Each Trainee has a different Career with different Goals and story Events. These are often based on the namesake horse’s actual Career.
Veteran Umamusume
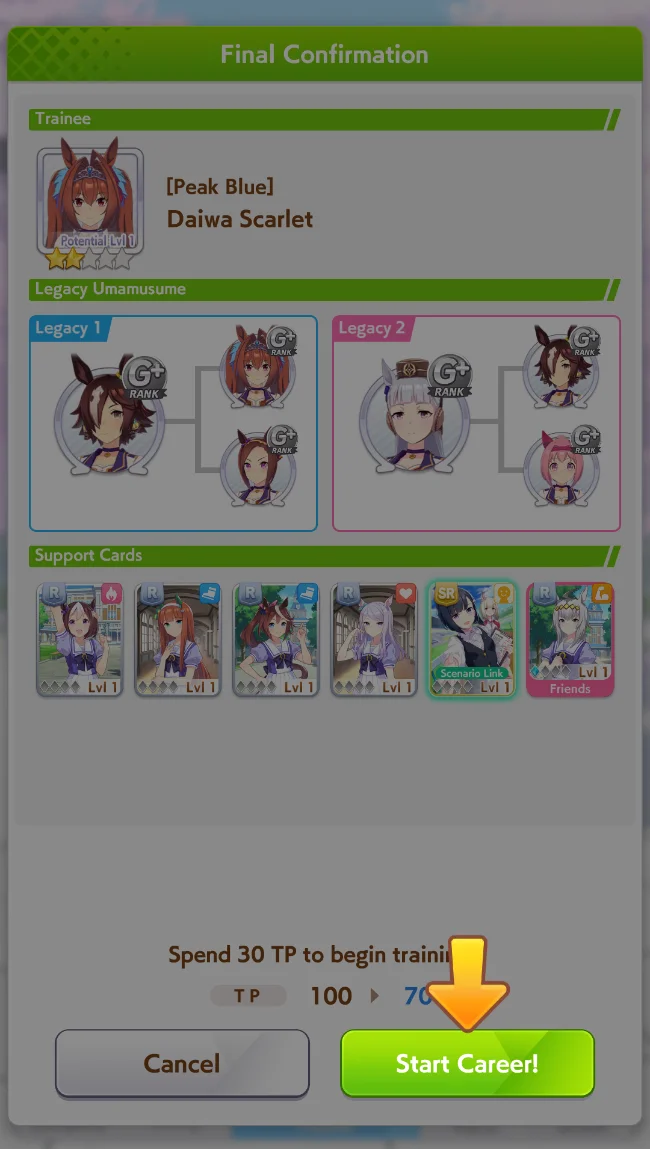
After we select our Trainee, we are then prompted to select two Legacy Umamusume. We can select our Legacies, often referred to as Parents, from our pool of Veterans. In the tutorial, however, we will have to select from pre-generated Veterans as we have not yet completed a Career.
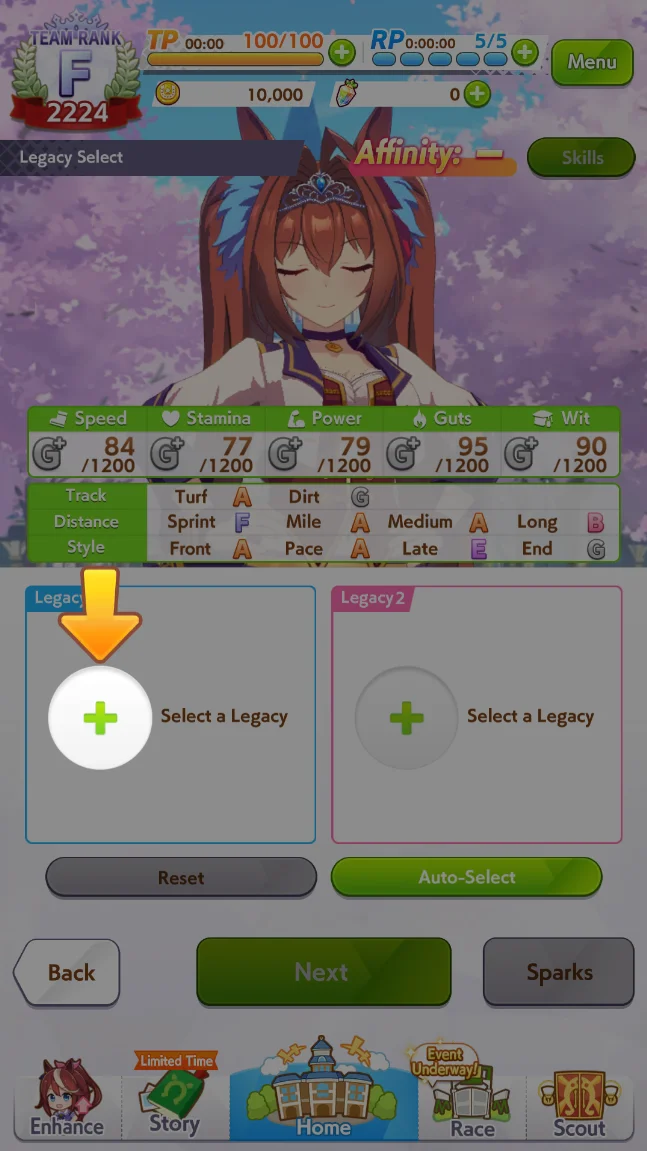
Selecting a Parent
Legacies provide various benefits to our Trainee several times through our Run. We will explore this in further detail later.
Support Cards
Finally, we are prompted to select our Support Cards. Support Cards are the second category of playable Umas we can unlock. Support Cards are not raised in Careers, unlike Trainees. Instead, we can bring up to six Support Cards in a Deck, which can provide various benefits throughout the Career.
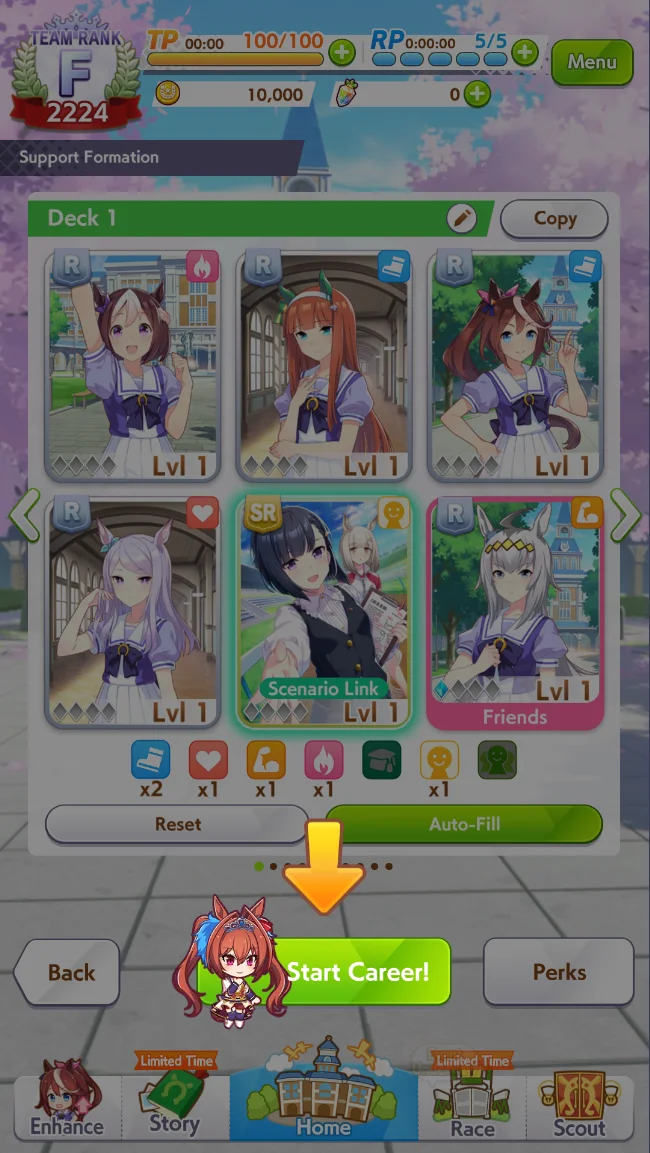
Selecting Support Cards
Most Support Cards are assigned an Uma and a type of Stat they primarily raise. The only exception to this are Pal Cards, which are not assigned a specific Stat and feature a Trainer instead. As Support Cards are still playable Umas, we cannot select the same Uma as our Trainee in our Support Cards, nor can we have 2 of the same Umas.
If you’ve played other Gacha games before, we can consider Support Cards to be similar to Fate/Grand Order’s Craft Essences, Granblue Fantasy’s Grid system, or Genshin Impact’s weapons.
TP
Now that we’ve selected all of our Umas, we can enter the Career. Careers will cost 30 of a resource called Training Points (TP) to enter.
Starting the Tutorial Career
TP is acquired at a rate of 1 per every 5 minutes, and can fill up to 100. This means that naturally, we generate enough TP to play 4.8 Careers a day. TP can also be filled through consumable items or by exchanging 10 Carats for 30 TP.
The Start of the Career
At the start of the Career, we will receive an initial stat boost from our Legacies in an Inspiration Event. This is one of the three times we will receive various benefits from Legacies throughout the Career.
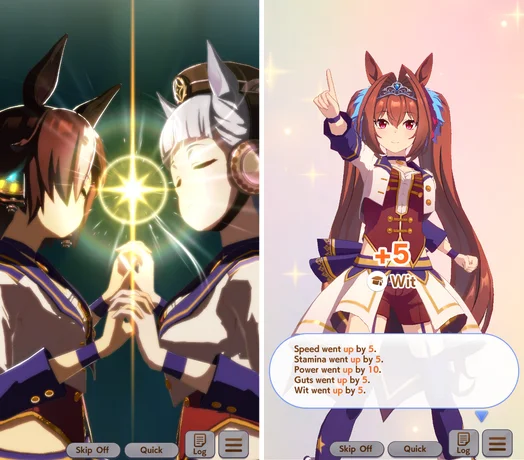
Initial Inspiration
We are introduced to the User Interface of a Career.
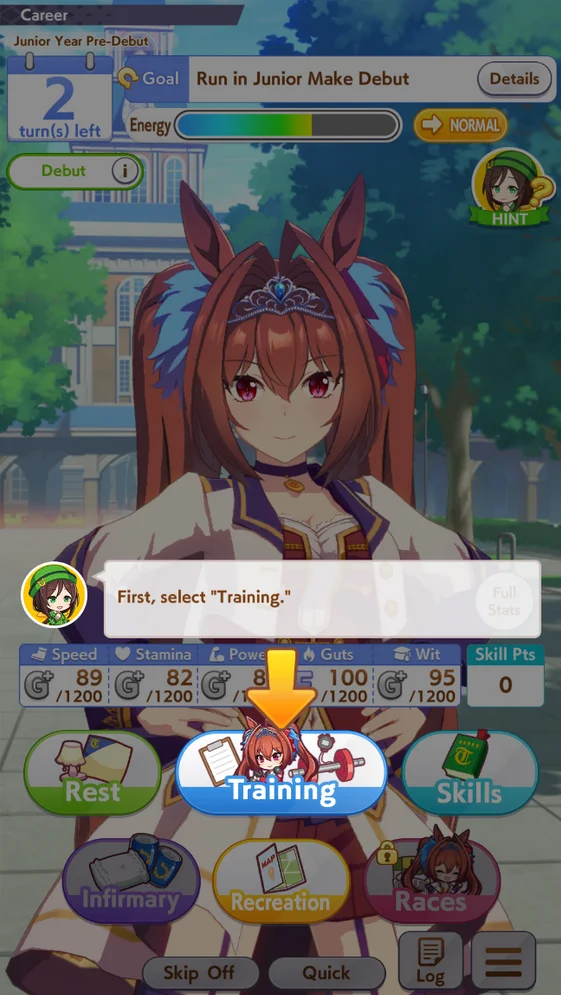
The Career User Interface
Let’s dissect this menu.
Turn: A unit of action during a Career. Each turn progresses the Calendar by half a month: A Career spans over three years.
Energy: The primary resource used during a Career. Training, Races, and various Events consume Energy.
Mood: A modifier on Training and Races. Has 5 levels, from worst to best: Awful, Bad, Normal, Good, and Great. Each level increases or decreases Stats gained from Training by 10% relative to Normal Mood. Mood also affects Stats during Races by 2% for each level.
Stats: A quantitative characteristic of the Uma. Each Stat serves a different purpose.
Skills: Purchaseable abilities that further supplement an Uma during a Race. The Skills button opens up the purchase menu.
Career Actions
In the UI, we can see 6 buttons. Outside of the Skills button, the other five buttons are Career Actions that consume a Turn to do.
Rest
Resting recovers Energy. There are 3 possible Events:
Sleep Deprived: Recovers 30 Energy. Has a chance to give the Night Owl condition, which will randomly reduce Energy or Mood before Turns.
All Refreshed: Recovers 50 Energy.
Well-Rested: Recovers 70 Energy. This Event will also cure Night Owl, if the Uma has it.
Infirmary
Going to the Infirmary has a chance to heal a negative condition and restores 20 Energy. An example of a negative condition is the Night Owl condition previously mentioned.
Recreation
Recreation increases Mood and small amounts of Energy. There are 3 possible Events:
Riverside Stroll: +1 Mood and +10 Energy
Shrine Date: +1 Mood and different Energy based on fortune pulled. Modest is 10, Good is 20, and Great is 30. Shrine Dates also have a chance to cure negative conditions.
Karaoke: +2 Mood and +0 Energy
Races
Opens the Race Menu. This is not unlocked for us until after the Debut Race.
Training
Training is the main method of increasing Stats in Umamusume. There are 5 Training Facilities, one for each Stat.
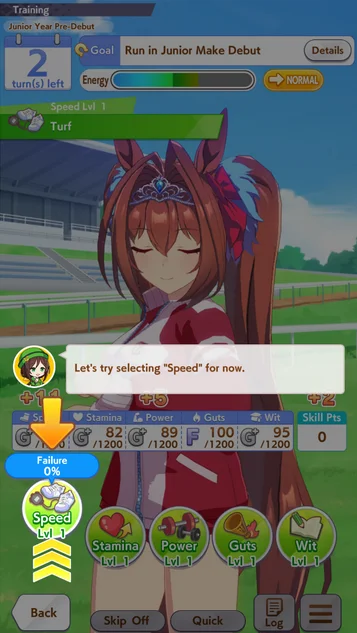
The Training window.wwwwwwwww
In URA Finale, which is the current Scenario, Training Facilities can be leveled, by Training on it 4 times. Each time a Training Facility is leveled, the Stats it provides increases. Training also costs Energy, and has a chance to fail. This scales inversely with your Energy.
Story Events
Between Turns, there will be small cutscenes that are called Story Events. These Events can come from the Scenario, the Trainee, or our Support Cards. Story Events will often give Stats, Energy, and sometimes Skills.

A Support Card Event
Some Events also have choices. While some Event choices do not matter, most of the choices will result in different rewards. We can check the rewards using the Effects button.
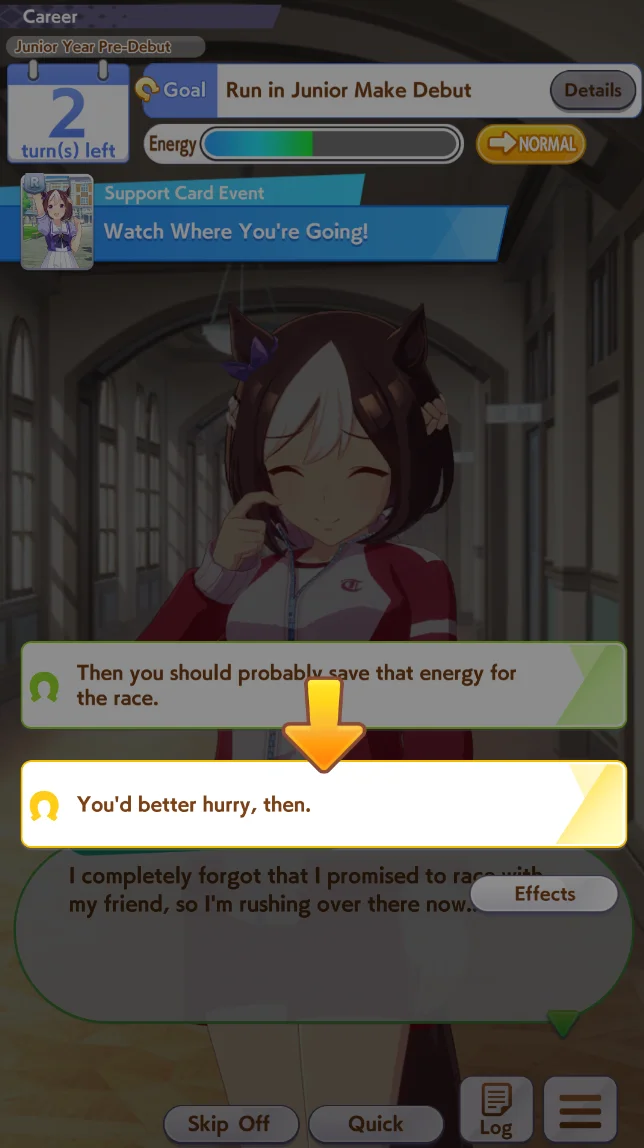
The Support Card Event's Choices
Debut Race
11 Turns into a Career is the Debut Race. Races are minigames in Career that are the main source of SP, the currency for purchasing Skills. The only input that can be made within the Race menu is changing the Uma’s Running Style, and the results are otherwise purely determined through the Uma’s Stats, Skills, and in-race RNG.
The Debut Race is the first Race in every Uma’s Career, and we cannot race before the Debut Race. If we lose our Debut Race, we are forced win a Maiden Race before we can race in other Races.
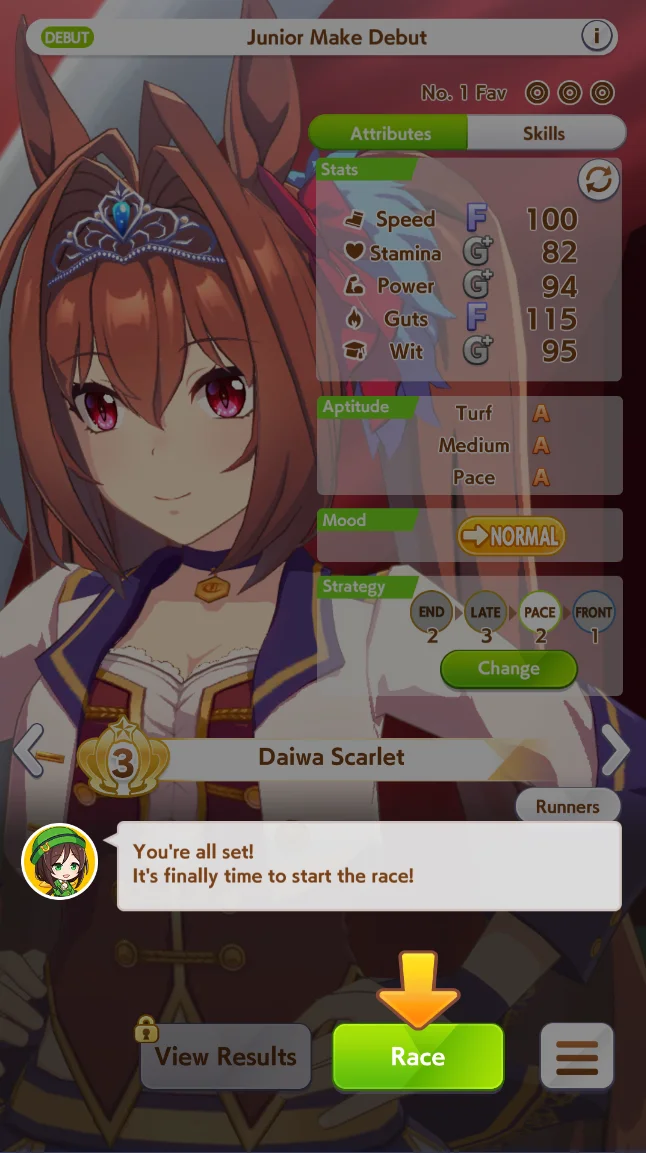
The Debut Race
There are two things to focus on in this menu: Aptitudes and Strategy. Aptitude is how well an Uma is suited to run on any specific Racetrack. Values below A are penalized, and values above A are rewarded. Strategy is the position an Uma will attempt to keep through the early-race, and for now, we can stick to the automatically chosen Strategy.
After the Career
As previously mentioned, we will receive a Veteran Uma after finishing a Career. A Veteran Uma has a quality called Sparks that determines the benefits that she will provide when used as a Legacy.
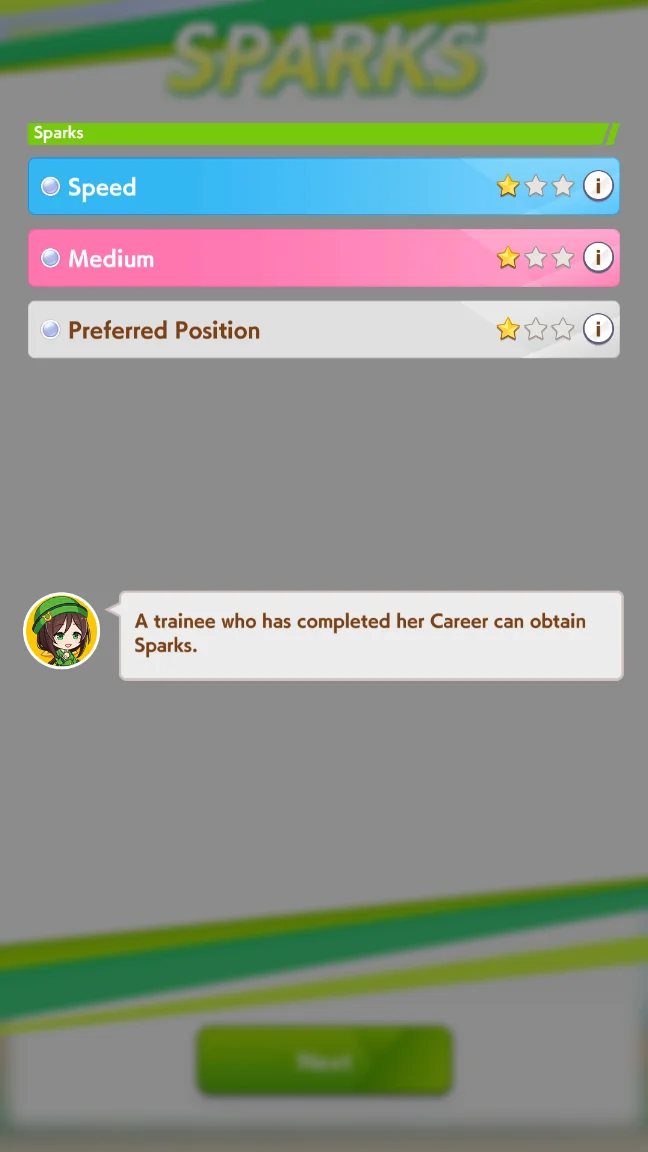
Post-Career Sparks
Blue Sparks are the Stats she will provide, Pink Sparks are the Aptitudes she will increase, and White Sparks are the Skills that she has a chance to give during Inheritance Events.
Basic Non-Career Mechanics
Under the Enhance Tab in the Lobby menu, there are a few things we can do to further enhance our Career experience.
Support Cards
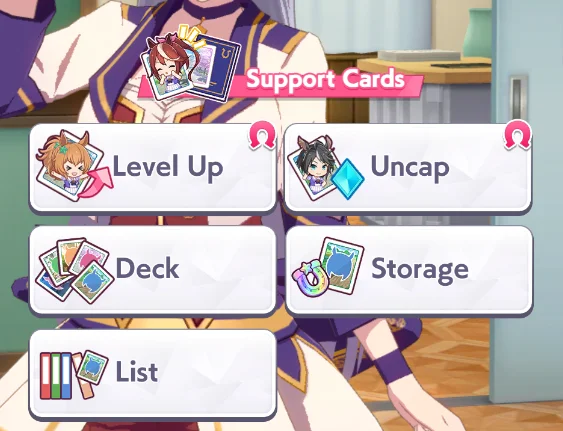
Support Card Enhance Menu
Support Cards start with minimal benefits, and gain more as we level them. Leveling Support Cards costs Monies and Support Points, two resources we can get from Daily Races and simply playing through Careers. Uncapping Cards is important because it raises the maximum level of the Support Card, effectively unlocking more benefits. Generally, we want to only use fully uncapped (Max Limit Break, MLB) Cards, but this may be difficult early on.
Trainee
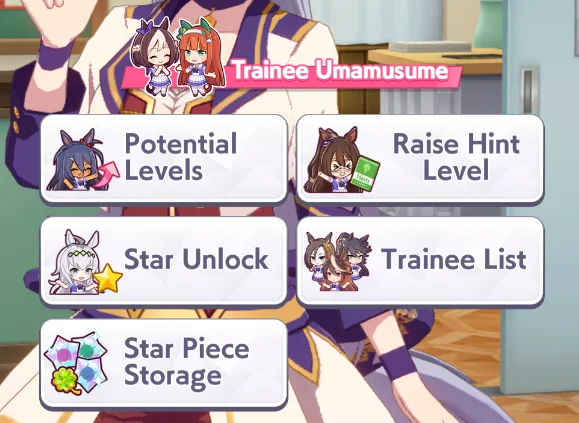
Trainee Enhance Menu
Unlike Support Cards, there are not many things we can do here to improve our Trainees. An important thing to consider is that we should not be raising the Potential Levels of our Umas early on. Potential Levels only unlock specific Skills for Umas to be purchased during Career, and can be ignored until we have a better understanding of the Skills we need. While Star Unlock does increase the Stats and Unique Skill Levels of our Umas, Star Pieces are gated behind Scouting and can also be ignored for now.
DANGER
Potential Levels are extremely expensive and can make your earlygame economy difficult!